|
|
markdown写的, 如果格式不清楚,直接看微信里的就可以。
https://mp.weixin.qq.com/s?__biz=MzA5MzY4MzcyMw==&mid=2247483763&idx=1&sn=38bf7310ebcd8c60ebada06d373562f8&chksm=905b6817a72ce101e4edb66a21a0b77307aca41b0e7e0925ccb8d5af9adeb2a6c58d6afad88f&scene=0&xtrack=1#rd
## GitHub发卡系统zfaka配置历程
### 1项目介绍
ZFAKA发卡系统(本系统基于yaf+layui开发)
项目地址 https://github.com/zlkbdotnet/zfaka
我的服务器是lnmp环境,所以我依据这个环境上安装
### 2检查yaf是否安装
1. 运行
```
php -m |grep 'yaf'
```
出现如下提示表示已经安装好
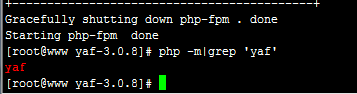
2, php-m是做什么的?
检查php下所有的model ,如果不知道,可以用php --help 列出所有的命令
3.grep命令解释
grep (global search regular expression(RE) and print out the line,全面搜索正则表达式并把行打印出来)是一种强大的文本搜索工具,它能使用正则表达式搜索文本,并把匹配的行打印出来。
参考:<https://**blogs.com/kongzhongqijing/articles/4462793.html>
### 3安装YAF扩展
如果没有安装的,先安装
我已经安装了yaf .但是一直提示 请按照安装要求安装YAF扩展
查看源代码: /public/init.php
```
//2.判断是否安装yaf扩展
if (!extension_loaded('yaf')){
echo "<div style=\"border: 1px dashed #cc0000;font-family:Tahoma;background-color:#FBEEEB;width:100%;padding:10px;color:#cc0000;\"><strong>警告:</strong><br>请按照安装要求安装YAF扩展</div>";
exit();
}
```
extension_loaded — 检查一个扩展是否已经加载,是php的内置函数 。
参考:php中extension_loaded()函数的使用详解
<http://www.php.cn/php-weizijiaocheng-382028.html>
在服务器上输入 php -m显示的结果是有yaf的,但是为啥还是提示呢?
=》发现找到个vhost下的对应配置,重新添加一下
### 4.更改application.ini
请按照安装要求将application.ini.new修改为 application.ini
发现已经改好了,但是还是会出现。
增加一个日志输出看看是不是路径不对。
```
echo APP_PATH.'/conf/application.ini';
结果:
/home/wwwroot/xxx.com/conf/application.ini
```
明明已经改了,还是不对,没有办法 ,只能去翻 wiki
发现取消防跨站攻击(open_basedir)就可以了
### 5.取消防跨站攻击(open_basedir)
注意:要输入带public的目录,
进入lnmp的安装目录 ,再进入tools目录执行。
```
[root@www tools]# ./remove_open_basedir_restriction.sh
```
然后需要让你输入目录,如果输入正确的话,会有消息 出来,如果没有消息 反应,
证明目录有问题,我开始就出现在这里,因为这个配置 要配置 到public目录,
我输入 目录的时候没有带public ,结果没有啥反应,以为好了,结果情况依旧。
报着试一试,输入了带public的目录,就可以了。
所以有的时候想不到解决方法 还是要多试一试。
第一次没有正确输入目录的情况.
```
[root@www tools]# ./remove_open_basedir_restriction.sh
+-------------------------------------------------------------------+
| Remove open_basedir restrication for LNMP, Written by Licess |
+-------------------------------------------------------------------+
| A tool to remove open_basedir restrication for LNMP |
+-------------------------------------------------------------------+
| For more information please visit https://lnmp.org |
+-------------------------------------------------------------------+
| Usage: ./remove_open_basedir_restrication.sh |
+-------------------------------------------------------------------+
Enter website root directory: /home/wwwroot/xxx.com
/home/wwwroot/shop.yhking.com/.user.ini is not exist!
```
第二次输入 正确目录的情况
```
[root@www tools]# ./remove_open_basedir_restriction.sh
+-------------------------------------------------------------------+
| Remove open_basedir restrication for LNMP, Written by Licess |
+-------------------------------------------------------------------+
| A tool to remove open_basedir restrication for LNMP |
+-------------------------------------------------------------------+
| For more information please visit https://lnmp.org |
+-------------------------------------------------------------------+
| Usage: ./remove_open_basedir_restrication.sh |
+-------------------------------------------------------------------+
Enter website root directory: /home/wwwroot/xxx.com/public
Gracefully shutting down php-fpm . done
Starting php-fpm done
Reload service nginx... done
done.
```
### 6.配置详情
```
//重写,要注意if后的空格
location / {
if (!-e $request_filename) {
rewrite ^/(.*)$ /index.php?$1 last;
}
}
include enable-php.conf;
```
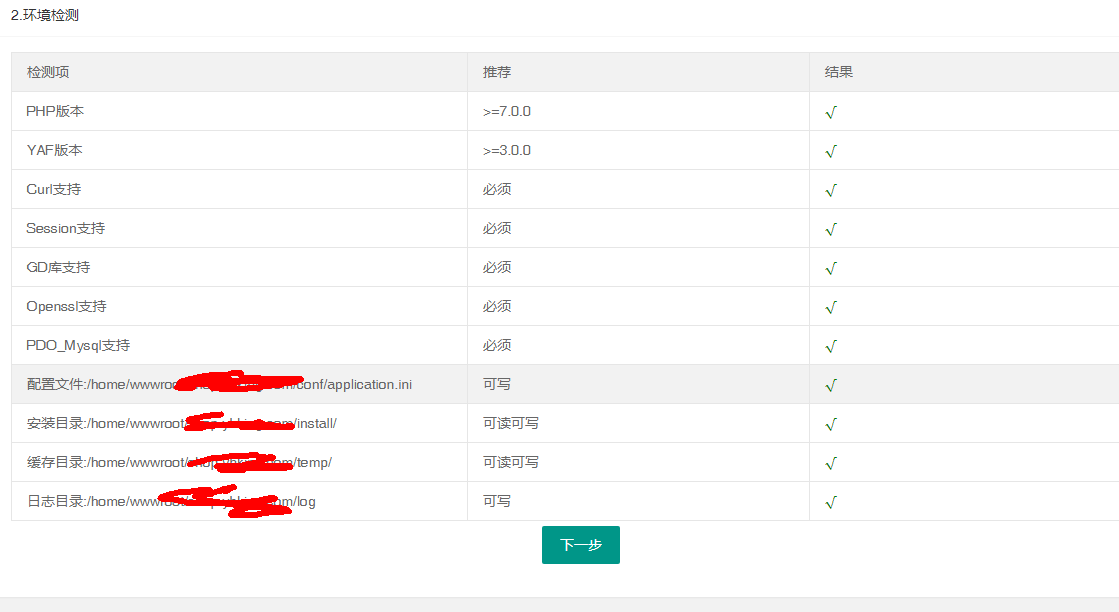
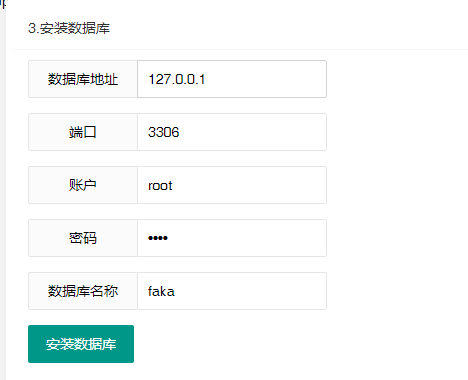
7.开始安装
然后再你输入域名,出来安装界面
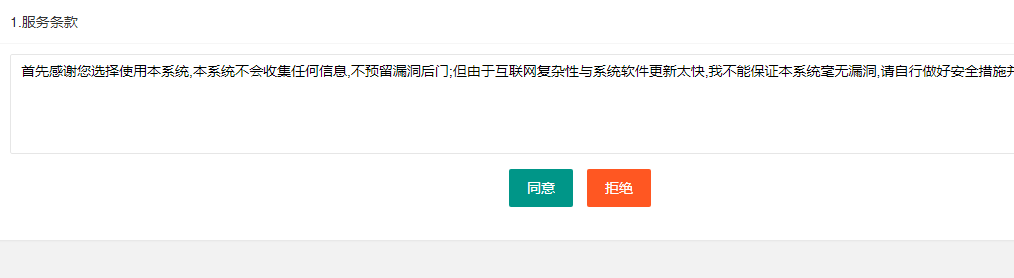
环境检测界面
数据库配置界面
安装成功以后,输入域名直接进入首页
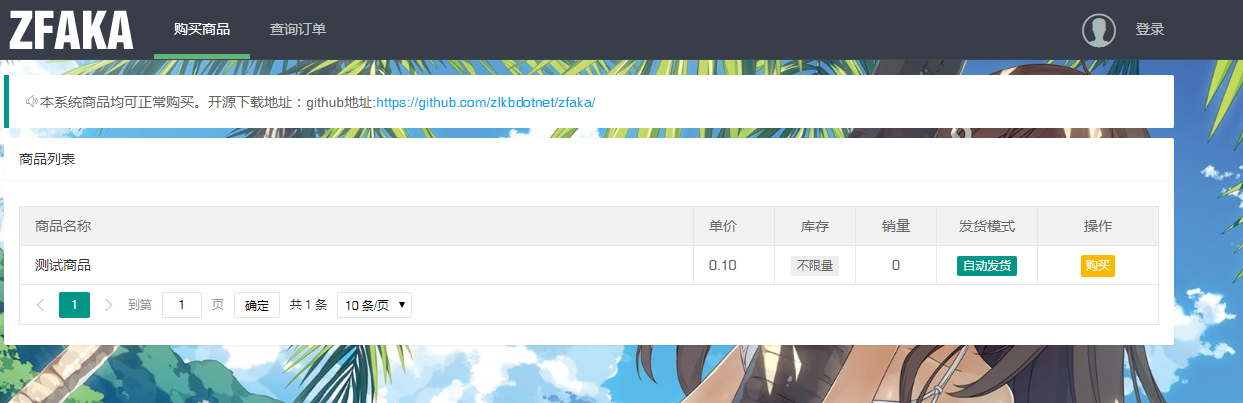
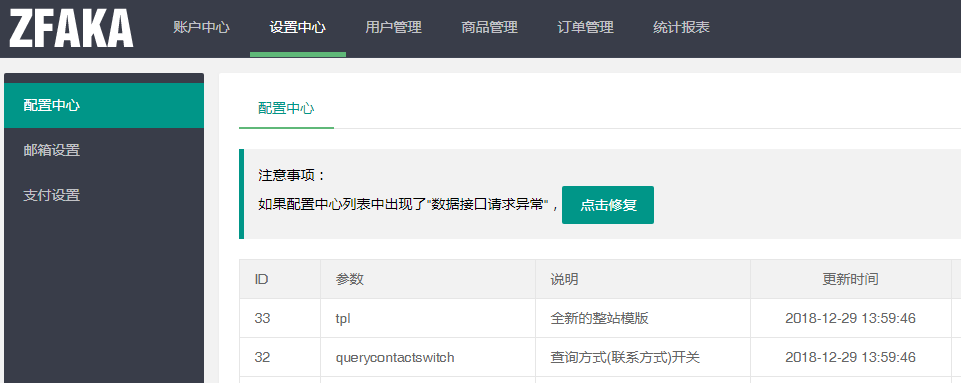
四,看下后台的界面
输入xxx.com/admin登录后台的首页。默认用户名:[email protected] 密码 123456
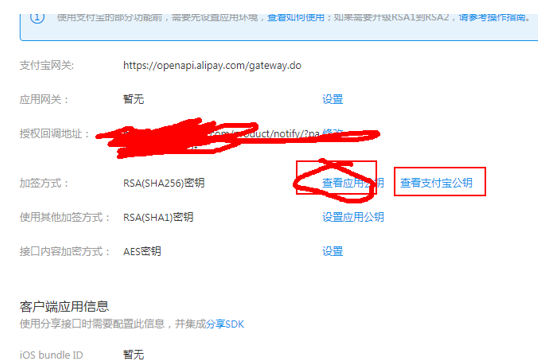
8.关于支付宝
微信,支付宝收费一定要企业商家账号,但是支付宝当面付你可以用特别办法开;
第一个是支付公匙
第二个是应用密匙
支付宝的接入,这里要看仔细
用支付宝的工具生成一对公(私)钥,这是应用密钥
把公钥放到支付宝里,支付宝对你这个公钥生成一个支付宝的公钥,
把支付宝的公钥放到应用里的私钥那里。
这样就保证了数据的安全。
### 7.总结
1. 安装yaf的时候,如果已经确认yaf安装好。 但还是不能正确显示 ,可能 查下配置的路径。
2. 取消防跨站攻击,要记得配置 ,不然不生效。
3. 重写规则时要注意 if (^xx)要有空格,否则会报错。 可以直接进行复制
4. 支付宝当面付的配置要注意
支付宝配置应用的公钥得到支付宝公钥,把支付宝的公钥和应用的私钥配置上去就可以了。
|
|


 发表于 2019-6-14 17:07:26

 QQ好友和群
 QQ空间
QQ空间 收藏
收藏